Group Assignment: Test the design rules for your 3D printer(s)
1 What is 3D Printing?
3D printing is a rapid prototyping system that creates objects by layering powder or liquid adhesive materials. It belongs to the category of additive manufacturing.3D printing uses a "bottom-up" approach based on the principle of "discrete accumulation." Unlike traditional subtractive manufacturing, it incrementally adds material in layers to form solid parts.
2 Equipment and Materials Overview
2.1 3D Printer Description
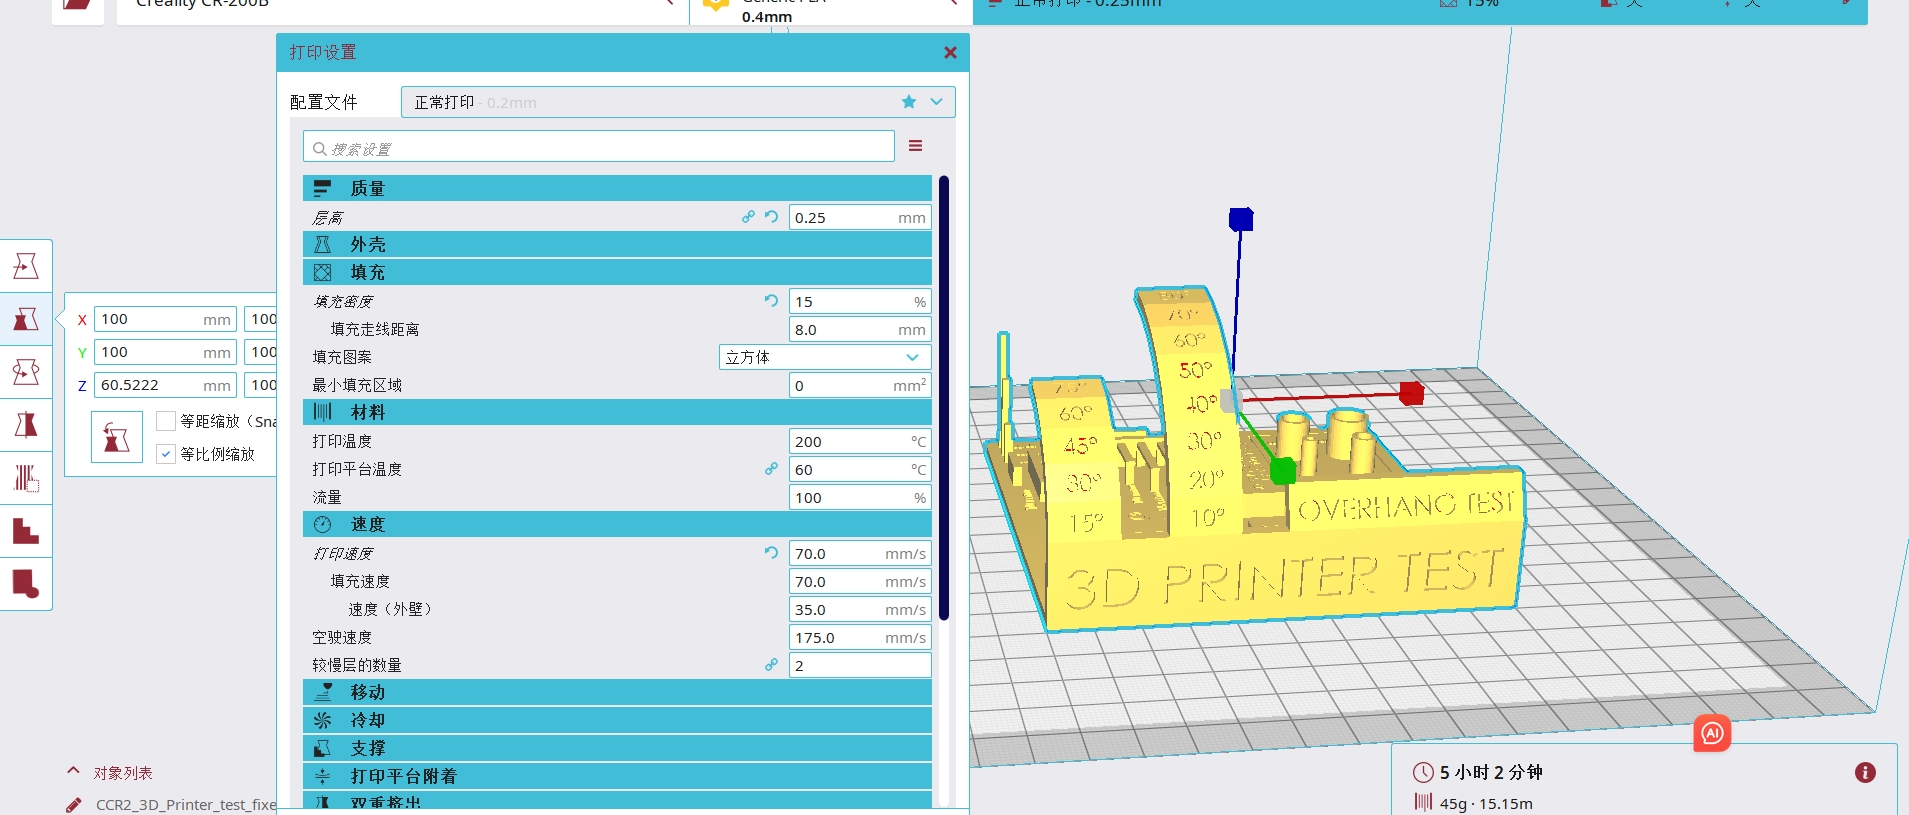
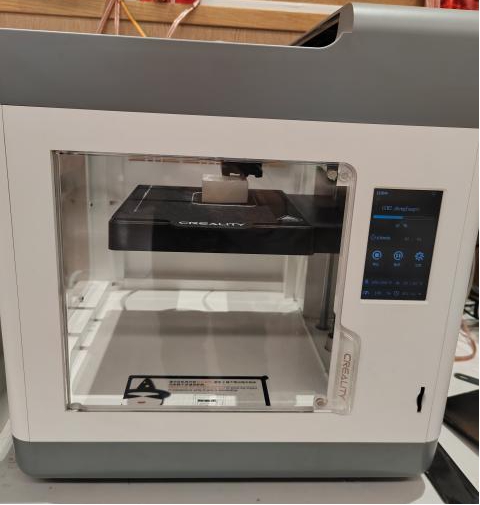
The 3D printer used in this time is personal, Creality CR-200B, which is small in size and cost-effective, suitable for family, school and other occasions. FDM is the full name of melt deposition molding, which was developed in 1988 by Scott Crump of the United States.
2.2 Material Description
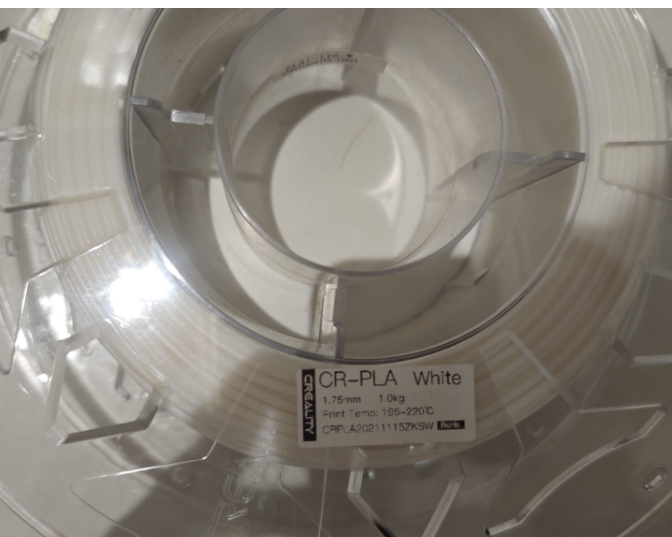
CR-PLA is a high-performance polylactic acid material with high strength, high toughness, excellent surface gloss and low warpage rate, suitable for education, creative design and functional prototyping, easy to use and environmental protection, and beautiful printing effect.
3 Parameter Settings and Testing Procedures
3.1 General Printing Process
- Check the filament: Ensure the filament is dry, free of tangles, and compatible with the printer.
- Insert SD Card: Verify the printing temperature settings match the material specifications.
- Prepare the Bed: Clean the print bed and apply glue stick for better adhesion.
- Heat Up: Select the correct file, confirm the nozzle extrudes material at the set temperature, and start the print.
- Monitor the Print: Stay nearby during the initial stages to ensure there are no issues with filament feeding or nozzle temperature.
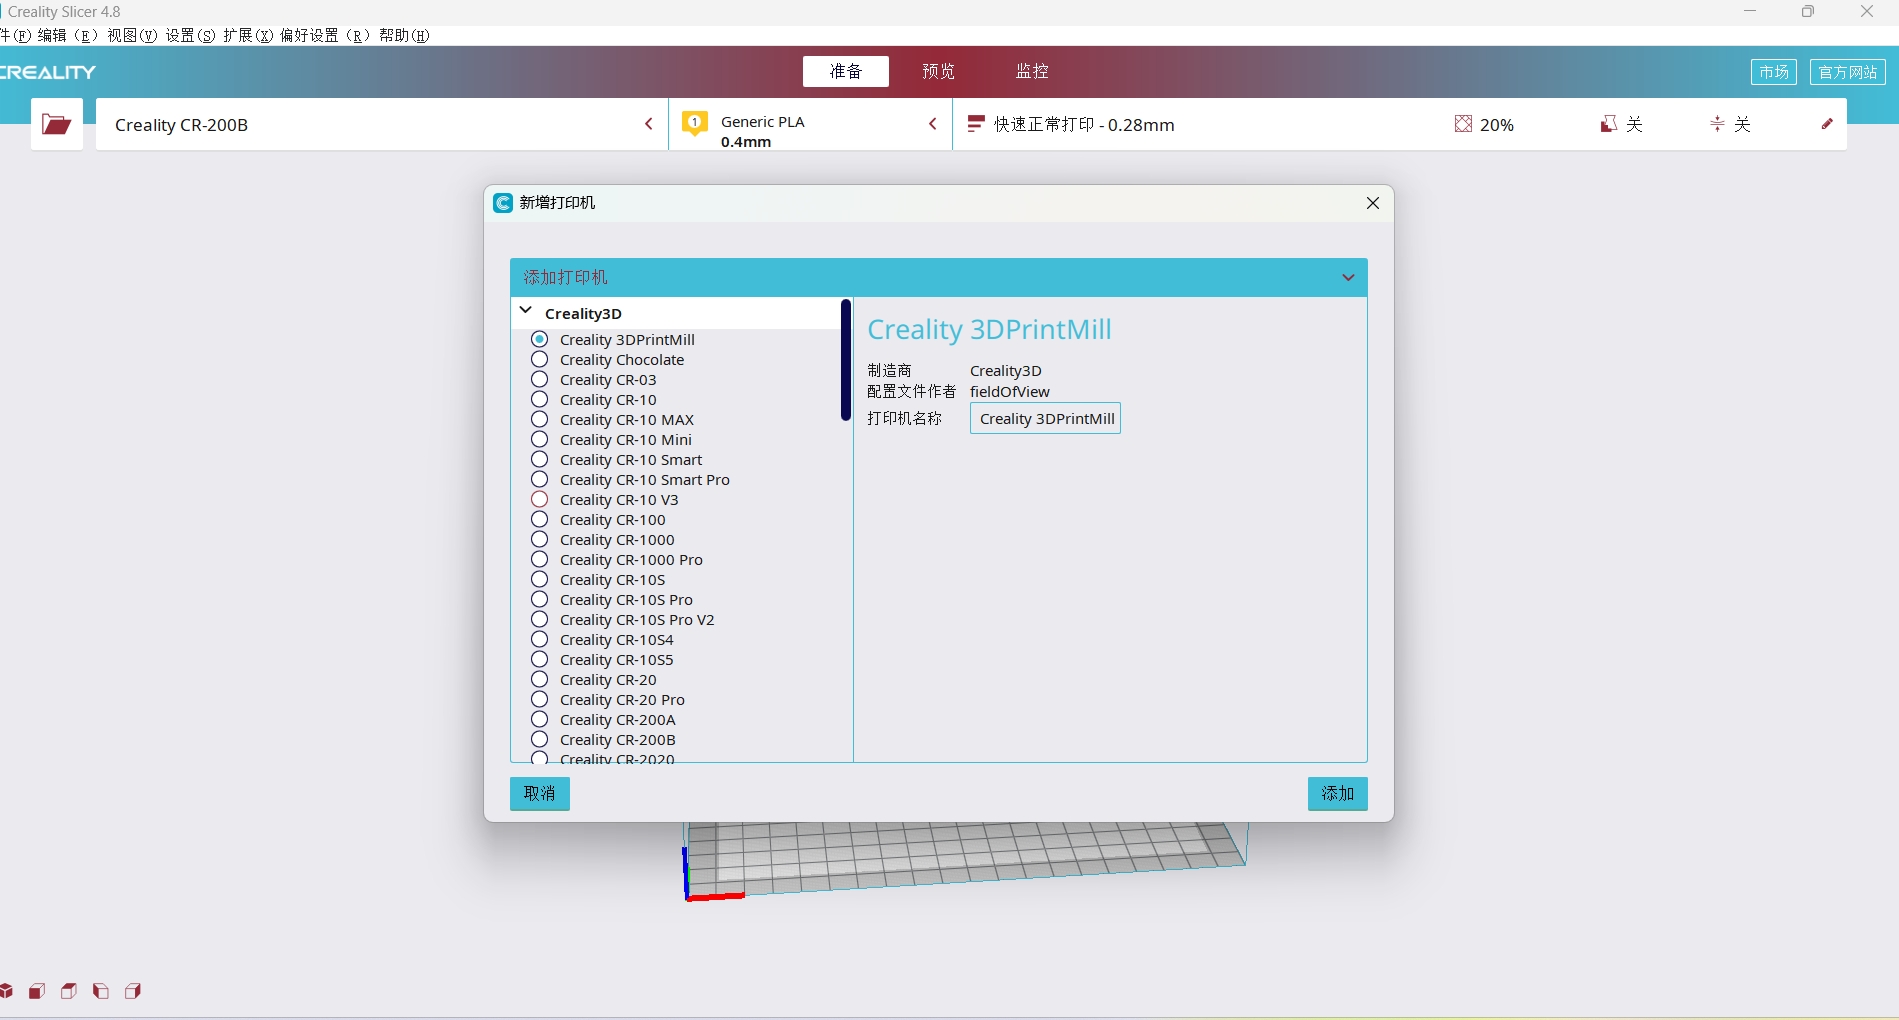
3.2 Software installation and printer addition
Install Creality Slicer & 123 Design
Add printer in Creality CR-200B
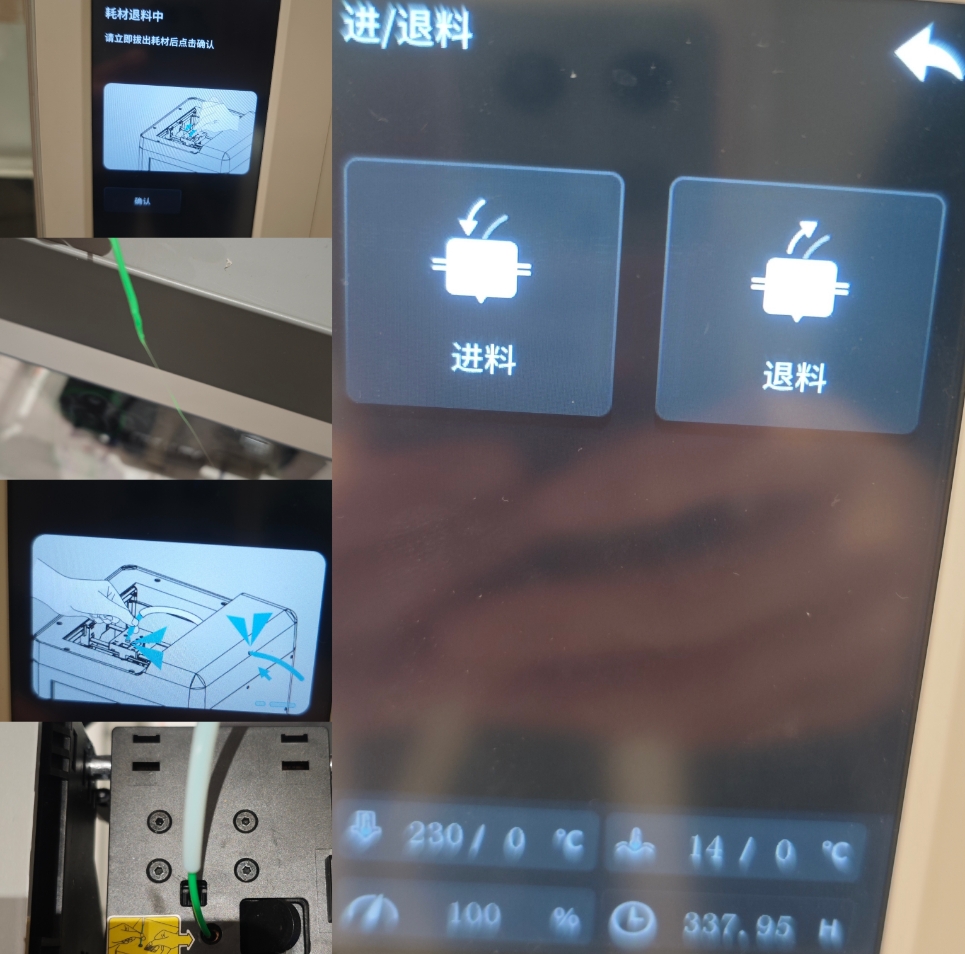
3.3 Incoming and returned materials
4 Key Parameter Tests
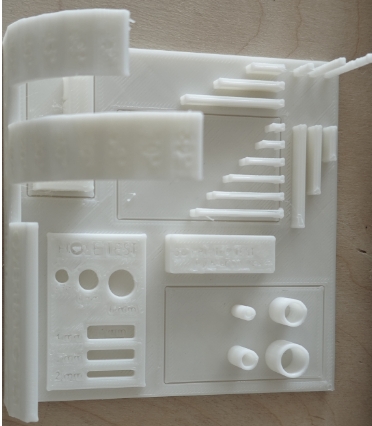
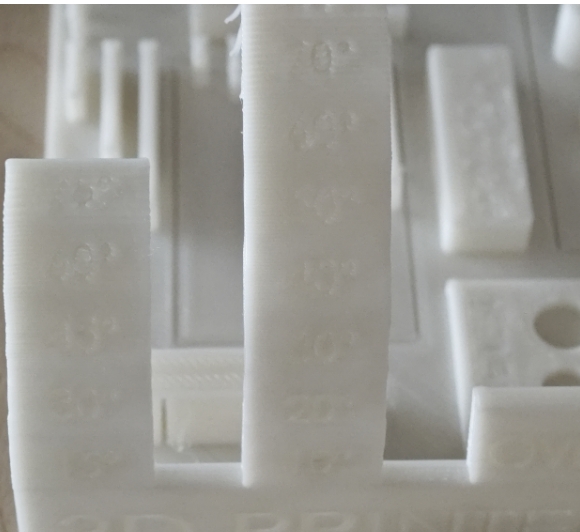
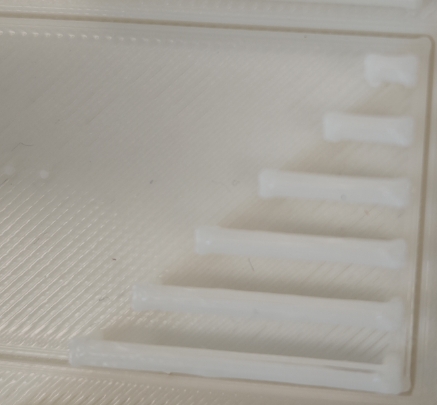
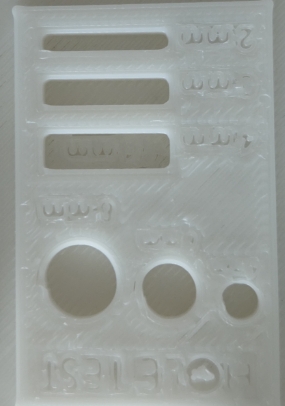
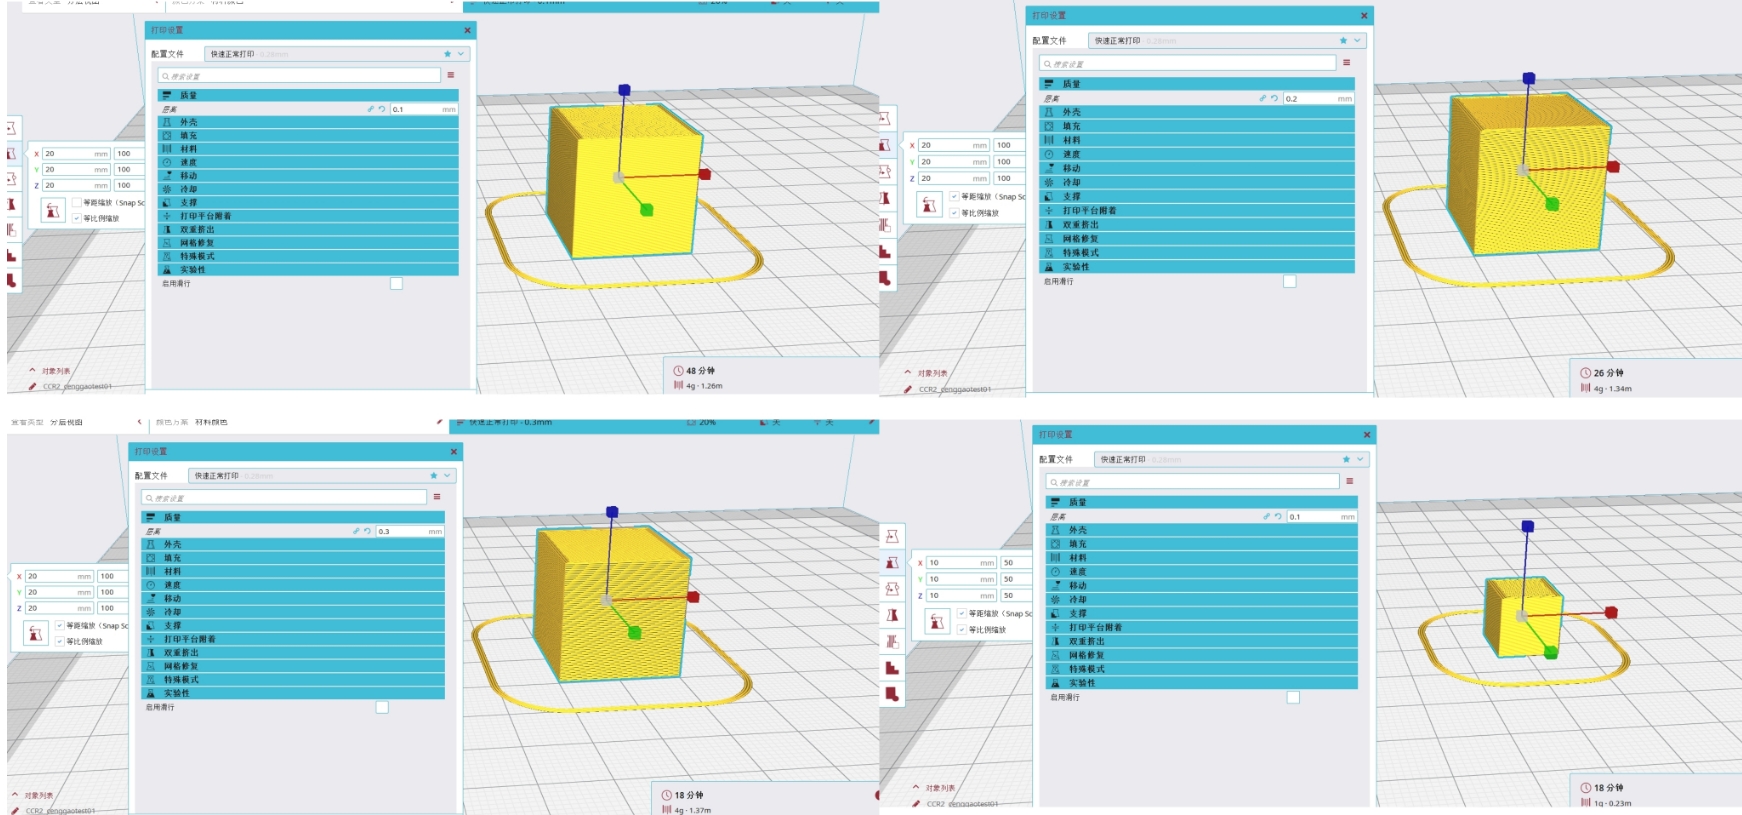
4.1 Layer Height Test
| Layer Height |
0.1mm |
0.2mm |
0.3mm |
| Material Usage (g) |
4g |
4g |
4g |
| Print Time |
48min |
26min |
18min |
| Surface Finish |
Very smooth, almost no stair-step effect |
Fairly smooth, slight stair-step effect |
Rough, noticeable stair-step effect |
| Detail Representation |
Clear details, suitable for complex models |
Good details, suitable for most applications |
Lost details, not suitable for fine models |
| Use Case |
High-precision parts, detailed models, products with high appearance requirements |
Everyday printing, balancing speed and quality |
Quick prototyping, efficiency-focused projects |
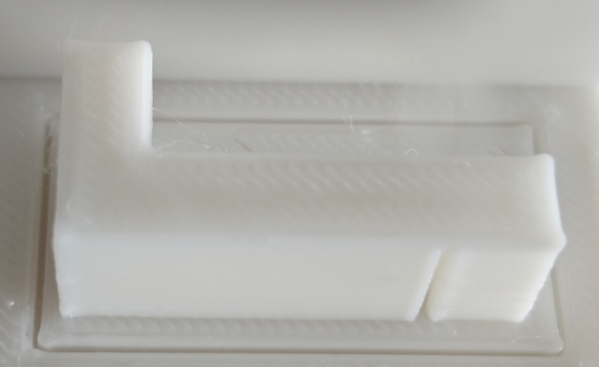
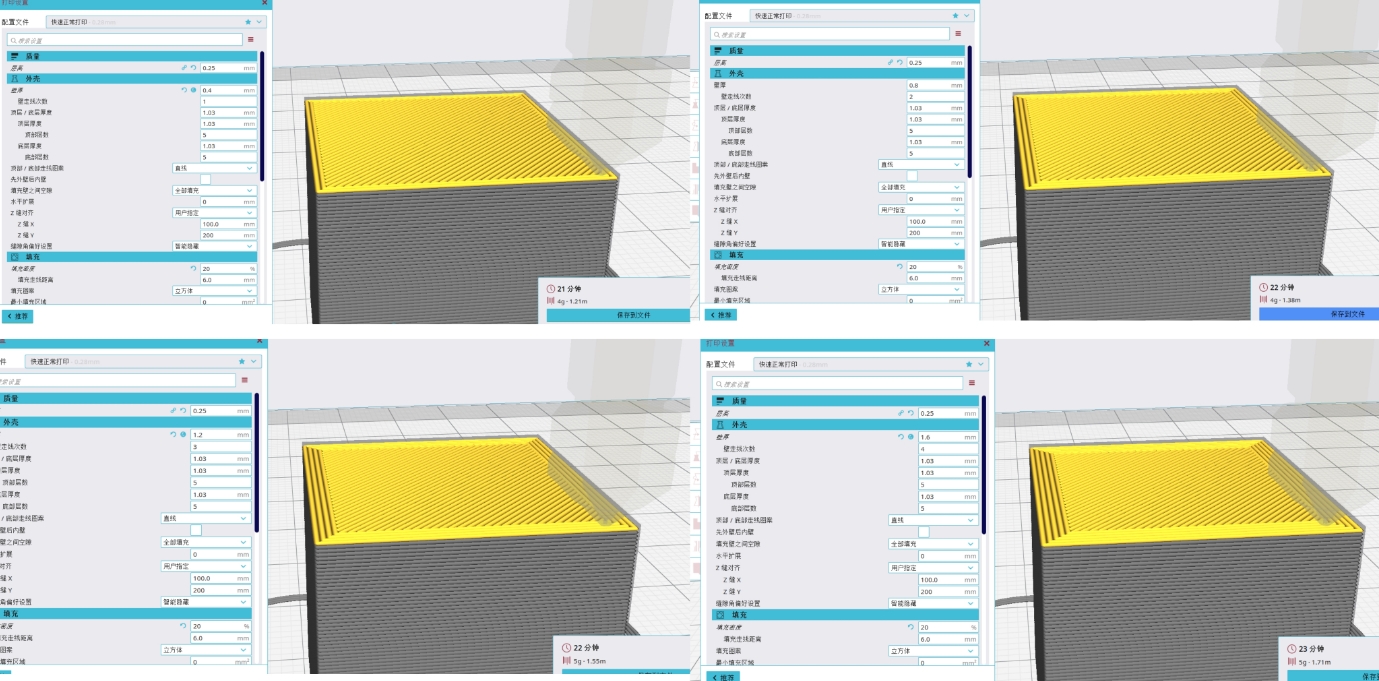
4.2 Shell Thickness Test
| Shell Thickness (mm) |
Printing Performance |
Structural Strength |
Use Case |
| 0.4 mm |
Incomplete or uneven shell |
Weak, prone to deformation or breakage |
Ultra-lightweight models |
| 0.8 mm |
Good shell uniformity |
Moderate strength, suitable for most daily applications |
Daily use applications |
| 1.2 mm |
Stronger shell, smoother appearance |
High strength, good compression and tensile resistance |
Daily use applications |
| 1.6 mm |
Very strong shell, almost no deformation |
Very high strength, suitable for high-strength requirements |
Functional parts or high-strength requirements |
4.3 Infill Density Test
| Infill Density (%) |
Printing Performance |
Structural Strength |
Use Case |
| 5%-10% |
Very lightweight, sparse filling, may be incomplete |
Lowest strength, prone to deformation or breakage |
Ultra-lightweight models |
| 20% |
Balance of weight and strength, common default value |
Moderate strength, suitable for most daily applications |
General-purpose parts |
| 50%-80% |
Dense filling, strong structure, nearly solid |
High strength, suitable for functional components |
Functional parts |
| 100% |
Fully solid, strongest |
Maximum strength, suitable for extreme load-bearing |
Structural components, special purposes |
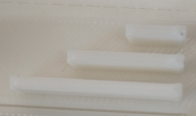
4.4 Print Speed Test
| Print Speed (mm/s) |
Printing Performance |
Surface Quality |
Structural Strength |
Use Case |
| 20-40 mm/s |
Long print time, material extrusion is sufficient |
Smooth surface |
Strong |
High-detail models |
| 60 mm/s |
Moderate print time, stable performance |
Slightly rough but acceptable |
Moderate |
Rapid prototyping, general-purpose parts |
| 80 mm/s |
Significantly reduced print time, minor quality issues may occur |
Possible stringing or slight roughness |
Weaker |
Fast prints |
| 100 mm/s |
Shortest print time, significant quality issues may occur |
Rough surface, noticeable defects possible |
Very weak |
Extreme speed testing |
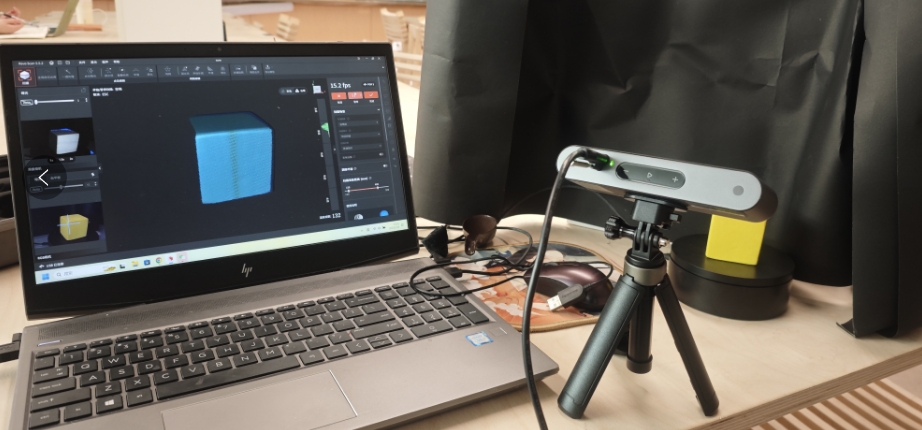
6 3D Scanning
A 3D scanner captures the three-dimensional geometry of an object through digital technology. The principle includes:
- The 3D scanner emits light or uses cameras to capture images of the object from different angles.
- The device receives the reflected or projected information and calculates the spatial coordinates of points on the surface of the object.
- It ultimately generates a "point cloud," which is composed of numerous points, and further constructs a three-dimensional model.
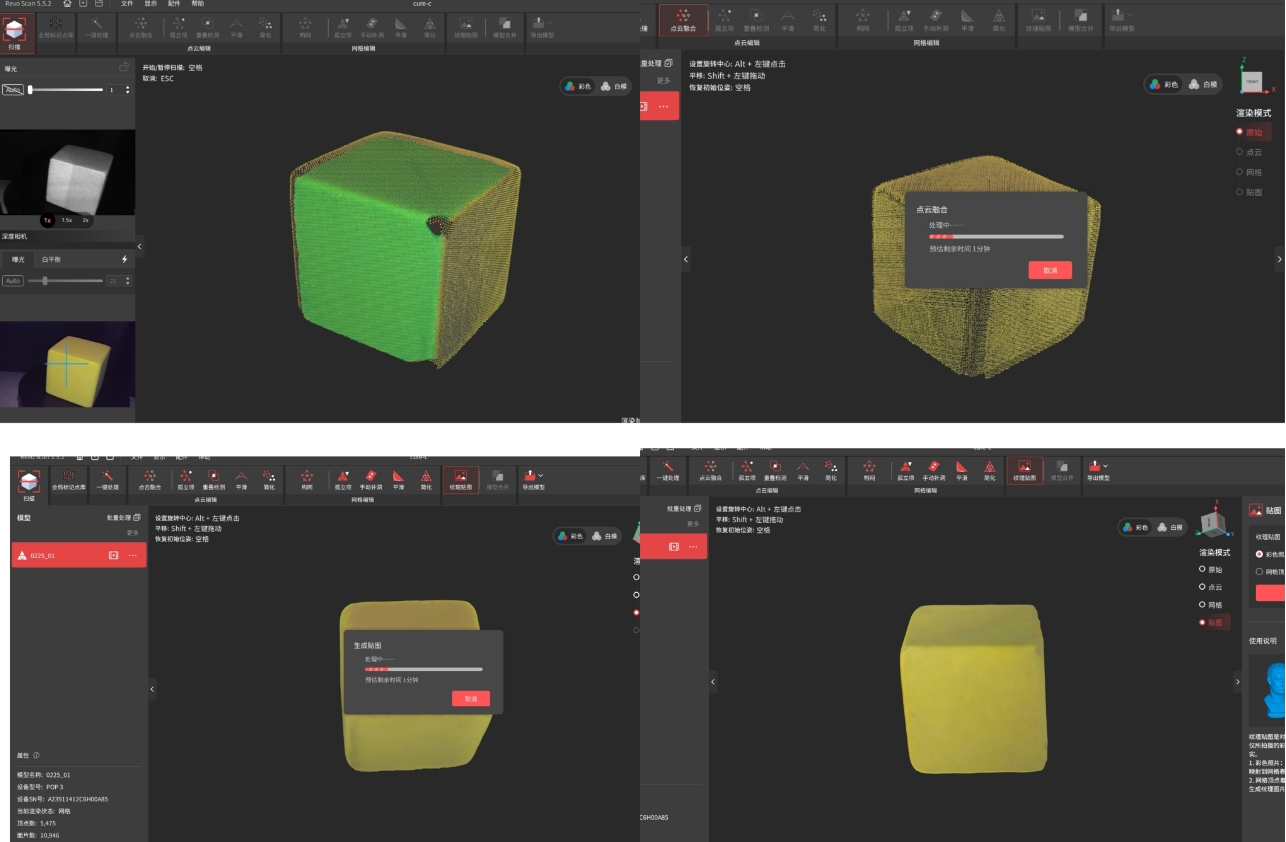
4.1 Know POP3 scanner and install the device
POP3The POP3 3D scanner is an efficient and accurate 3D scanning device that quickly captures the 3D geometry of objects and generates high-quality point cloud data.
windowsRevoScan5
4.2 Procedure
Scanning, point cloud editing, grid editing, mapping
4.2.1 Model black and white mode, no subsequent texture mapping.
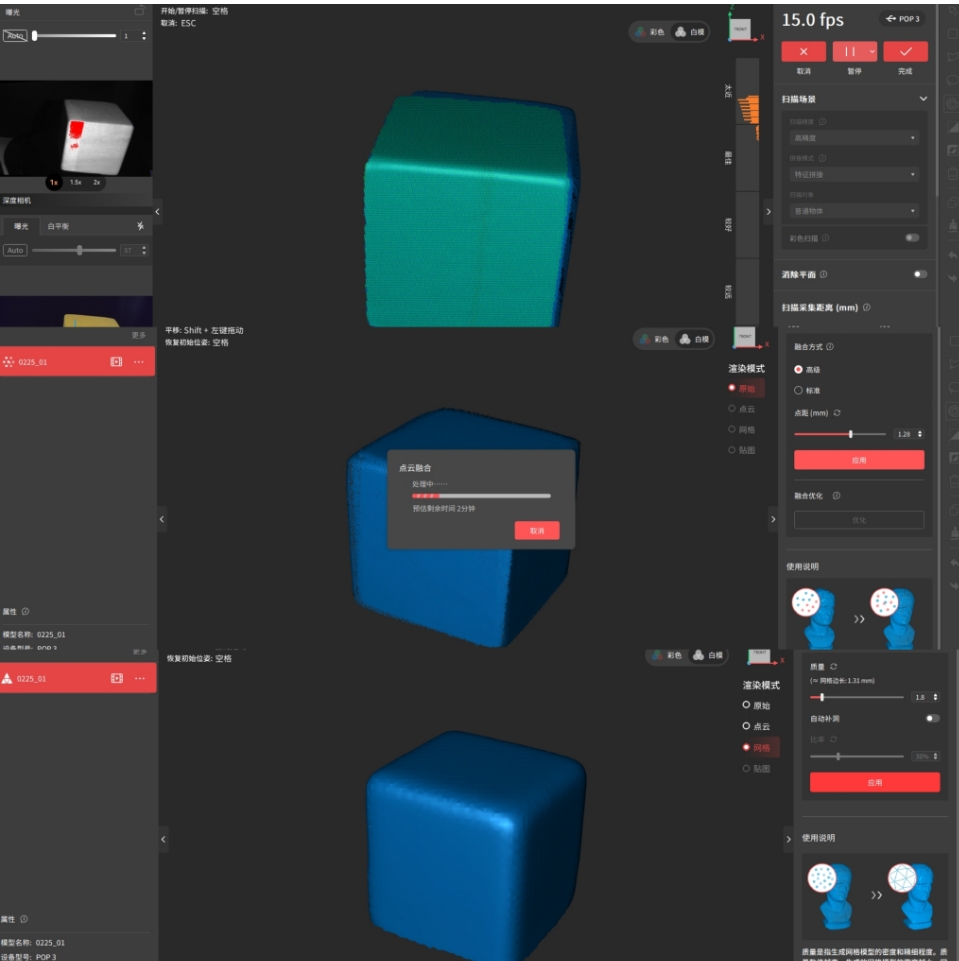
4.2.2 Model color mode, then direct texture mapping
4.2.3 Self modeling
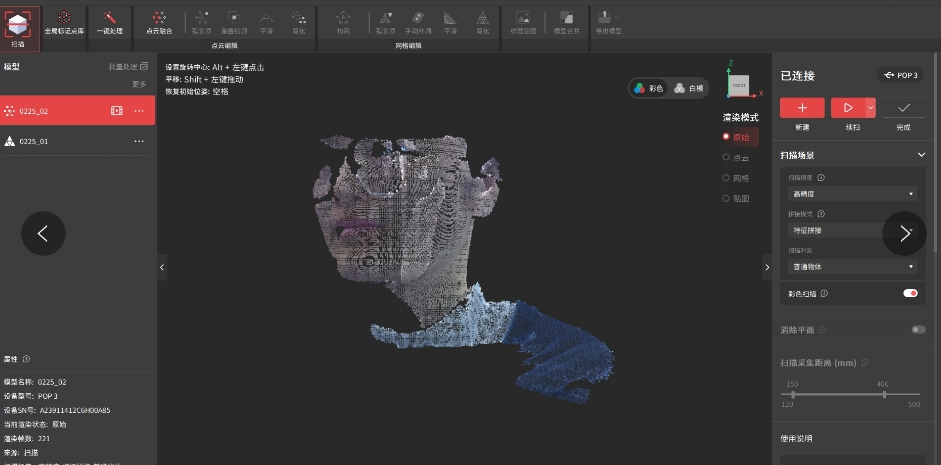
4.3 Goertek VR model full-body scanner
With the help of Goertek colleagues, we completed the model calibration, full-range photography of the human body, camera parameter calculation, model training, mesh reconstruction optimization, texture generation, and finally obtained the full-body scan model